Sharp PC-4600 (PC-4602/PC-4641) External Floppy Drive
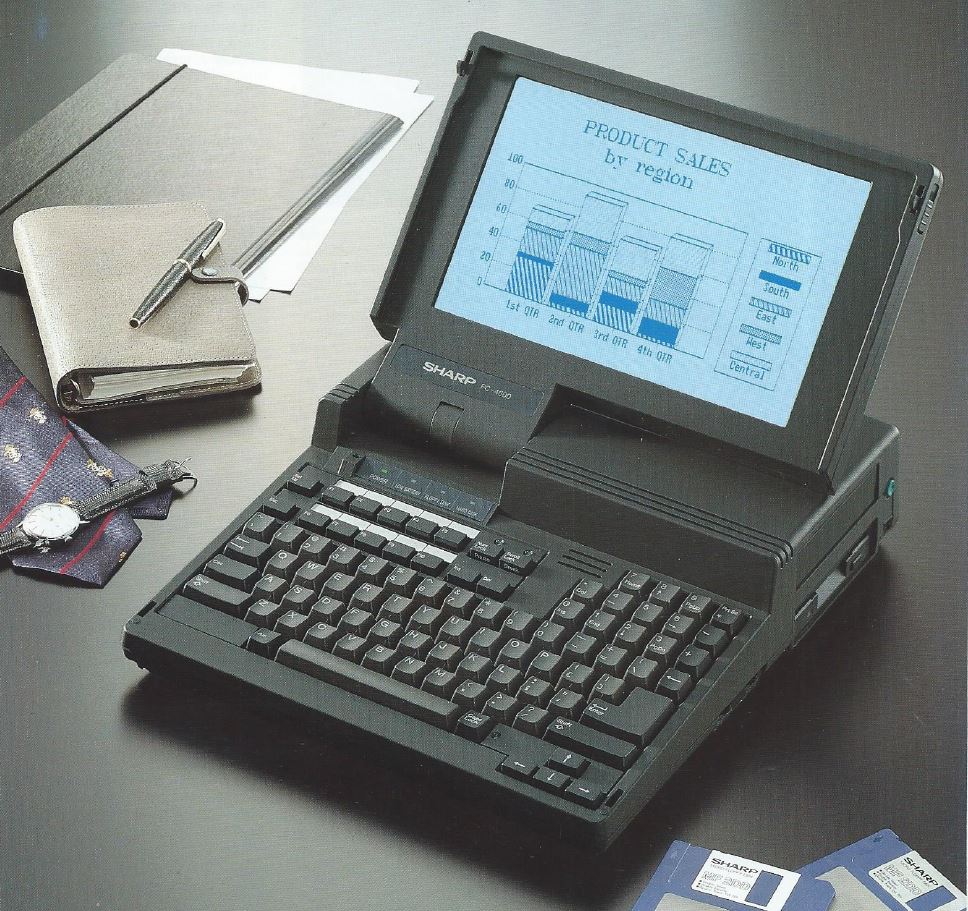
This project adds and configures an external Floppy Drive (360K) to a Sharp PC-4600 (PC-4602/PC-4641) Notebook computer from around 1989.
Introduction
The Sharp PC-4600 (PC-4641/PC-4602) is a laptop with an NEC V40 processor, Optional 40MB HDD or Dual 720K floppies, and a number of expansion capabilities, including external CRT, Expansion Bus and External Floppy Drive. For a Laptop in 1990 it is quite compact and has a very integrated motherboard. The one I’m working on here is the PC-4641 with the 40MB Hard Drive (Made by JVC as a matter of interest and still going well)
As the system uses a 720K floppy drive that is currently not functioning, and replacing with a 1.44MB floppy doesn’t seem to work. I thought I would investigate using an external floppy drive with this system.
The System

From its era, it is a relatively compact highly integrated system, with ASICs performing most of the logic and limited discrete logic chips on board.
Side Connectors

The external Floppy Drive can be used with either the HDD Model or the dual Floppy model. It provides an external 360K 5.25" Floppy drive to the system, supported by the BIOS.
The BIOS is hard coded to be 720K for the internal drive and 360K for the external drive.
PCB Design
In order to build this I have obtained the service manual for this sytem. Using this and reverse engineered the external FDD Port pinout and signal types. I determined all signals are the same as a standard FDD Interface, so no logic is required to invert, or level shift any signals, making the PCB entirely passive.
We obviously need the standard IBM PC Floppy drive 34-pin connector pinout too, this is easily available online. From this point forward we are just joining connections together.
Floppy Drive Controller Schematic
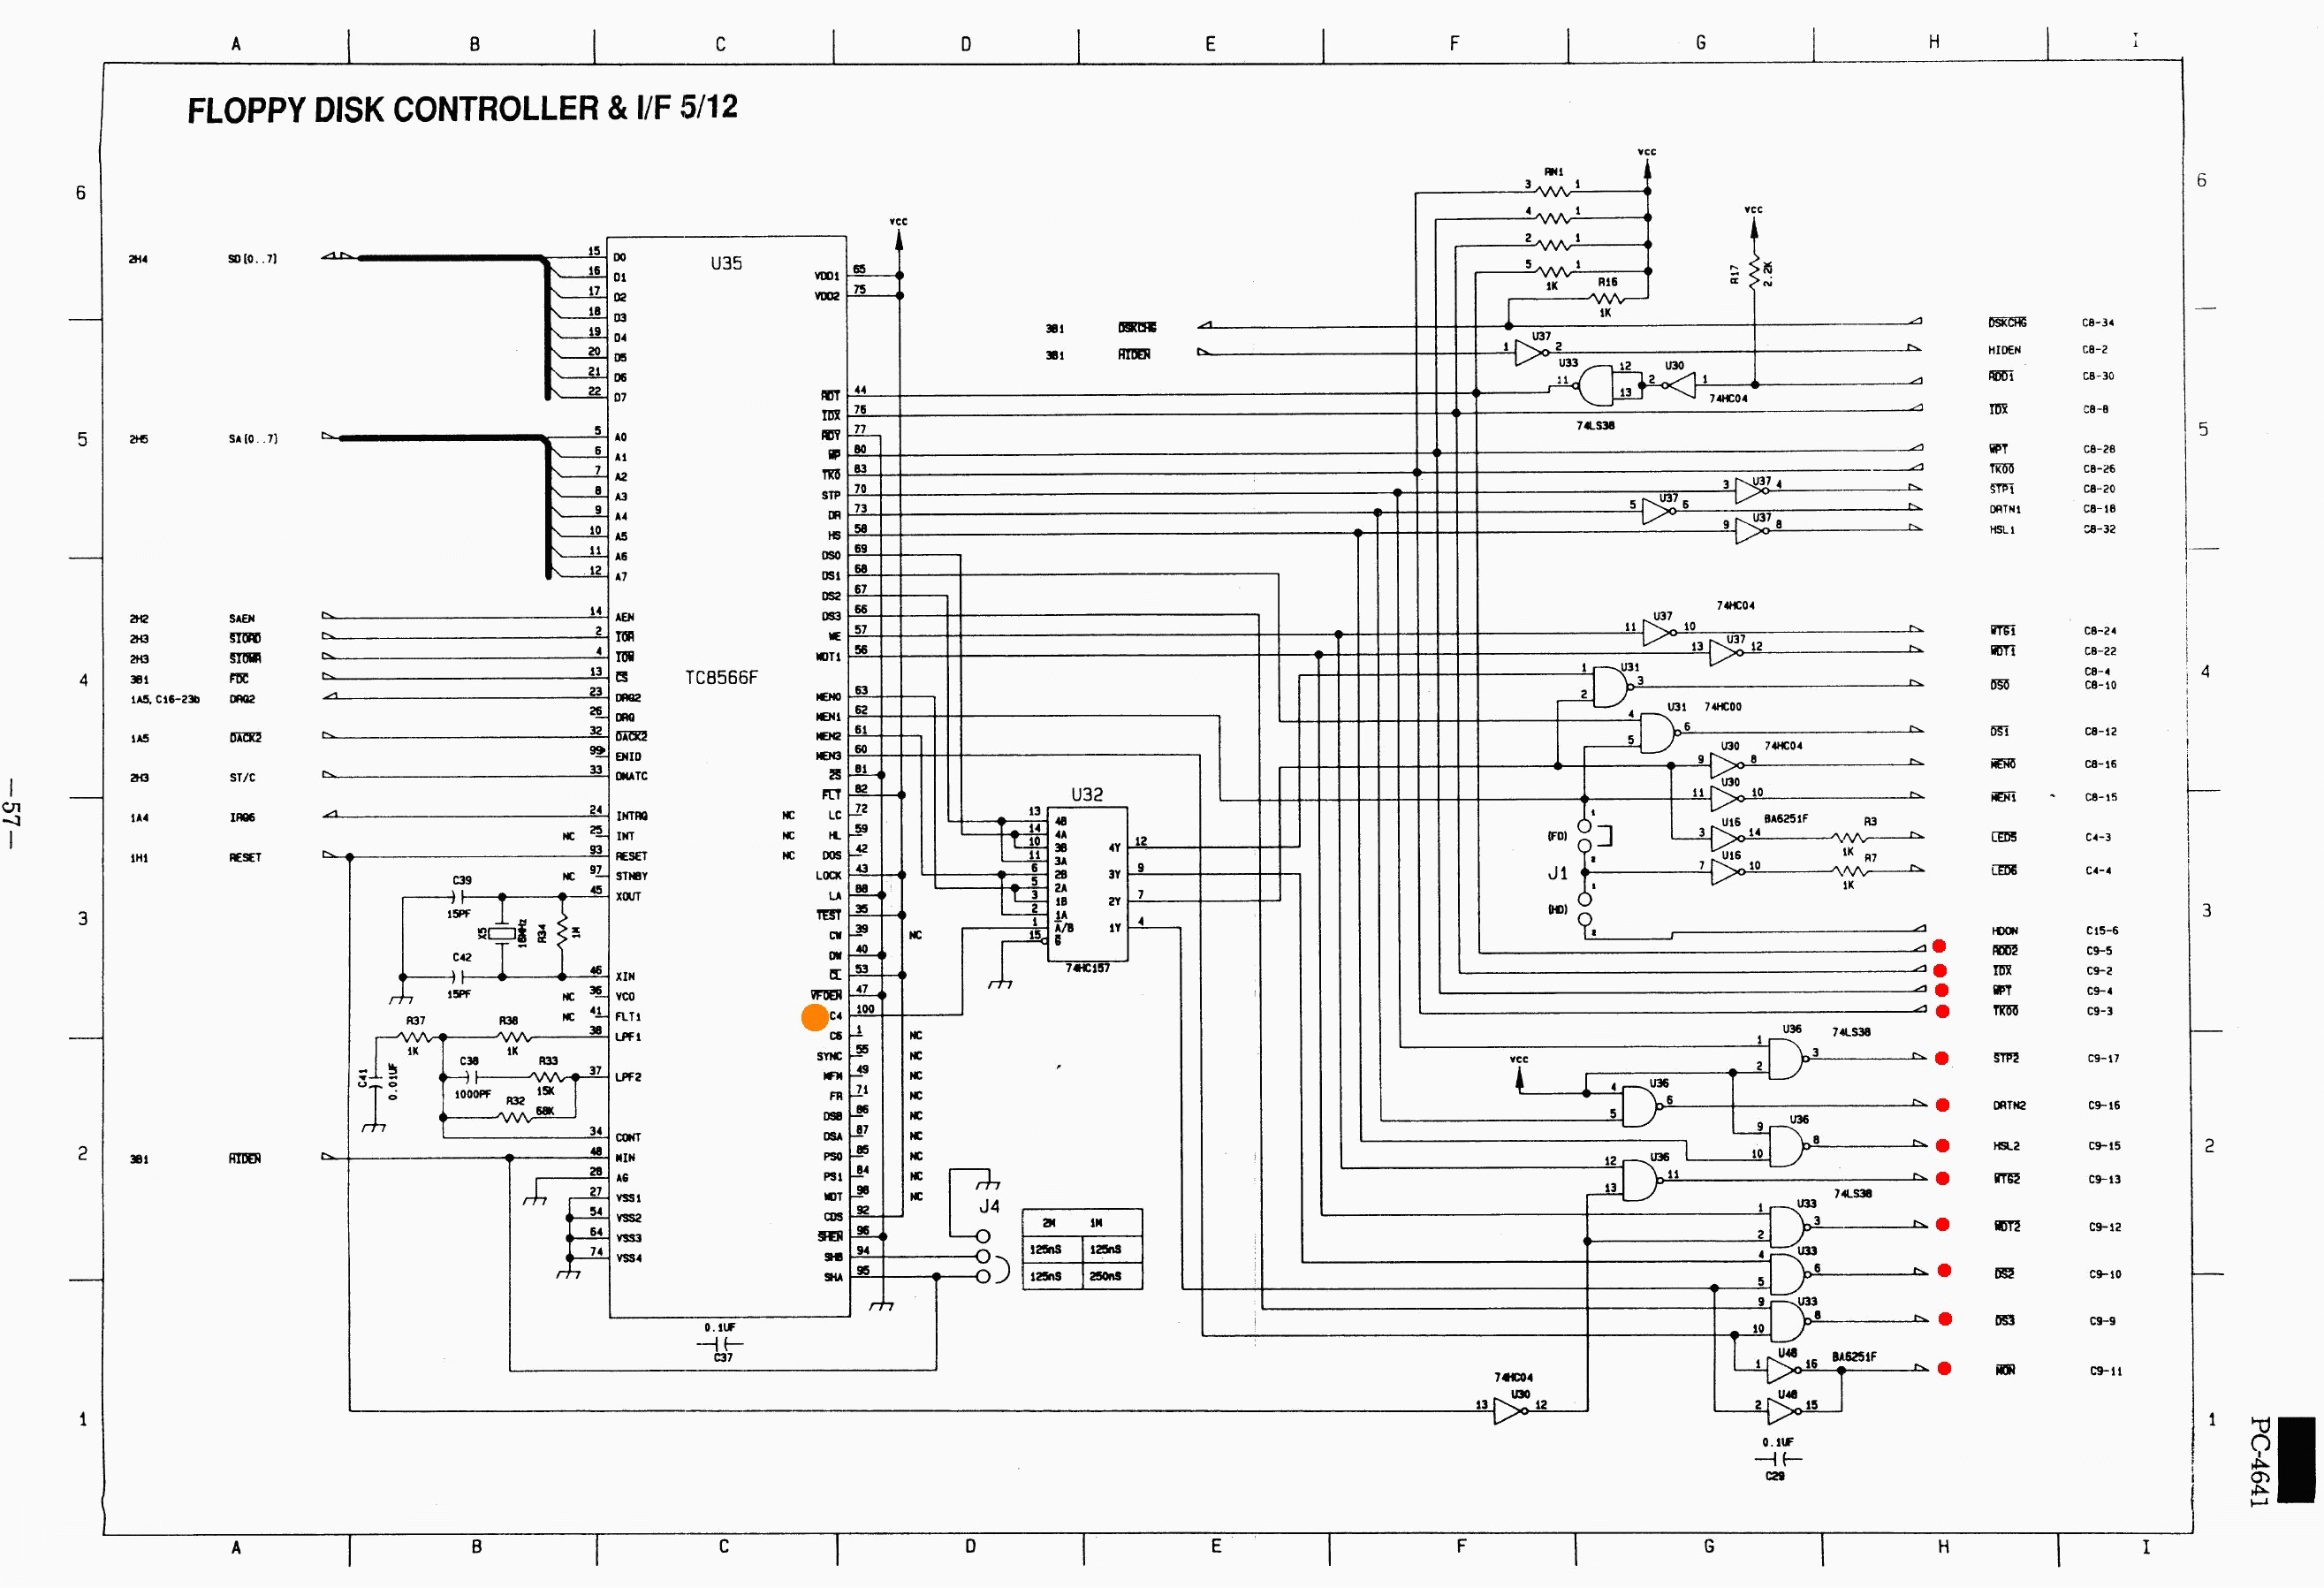 TIP: Click on Image to open larger
The floppy drive connector appears to support using 4 Floppy Drives, so this could be interesting to investigate in the future. Ensuring the appropriate DS0 and Motor Enable signals are all passed through on our PCB would be beneficial.
The Red dots indicate the signals exposed on the external FDD Connector.
The Orange dot on the FDD Controller C4 pin, is where the BIOS controls the Boot Order of Internal/External, this flips DS0/DS2 to DS2/DS0
External Floppy Connector Pinout
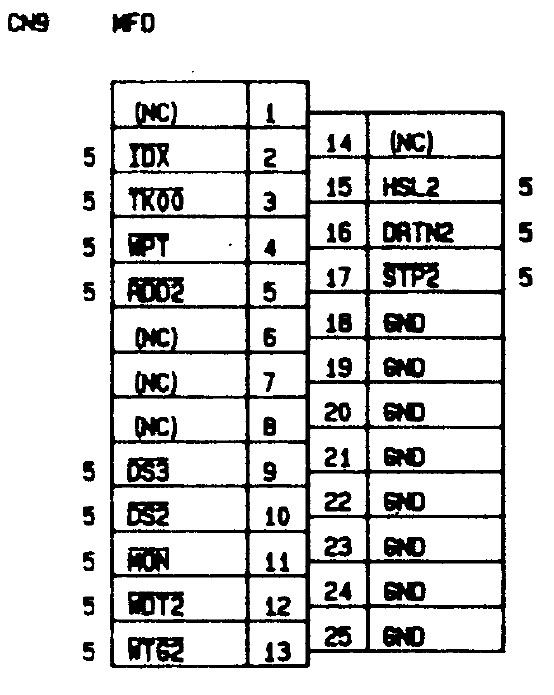
After reviewing this is the PCB I came up with. Compact enough to fit in the read of an external enclosure.
Kicad Render of the breakout adaptor
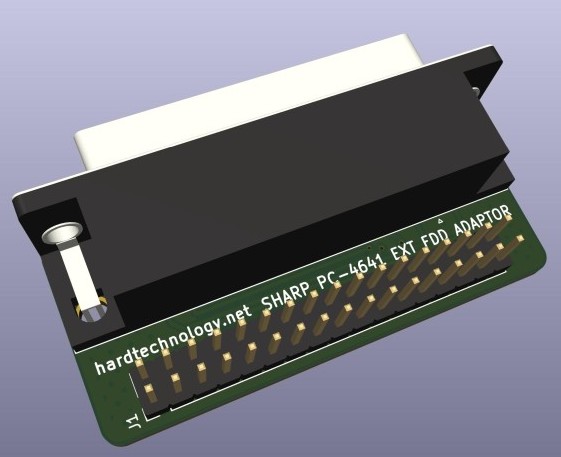
This is the finished design. A standard FDD cable can now be used (without twist) to enable the external Floppy drive to work.
Assembling the PCB
I had the PCB made by JLC PCB and was completed in about 2-3 days with their standard service. I chose the cheap shipping option of 10-ish business days, so now time to wait…
Once received (on time), time to get soldering. All we need is the DB25 connector and some IDC Header. It’s a simple task to solder these on and cleanup the left over resin on the board.
I also made a short Floppy drive cable - not documented here - you could easily use an existing IBM PC Floppy drive cable.
Parts:
Altronics P3230 - DB25 Female PCB Mount 90 Deg
Altronics P5410 - Pin Header 2.54mm (snap off 34-pins)
The Assembled PCB
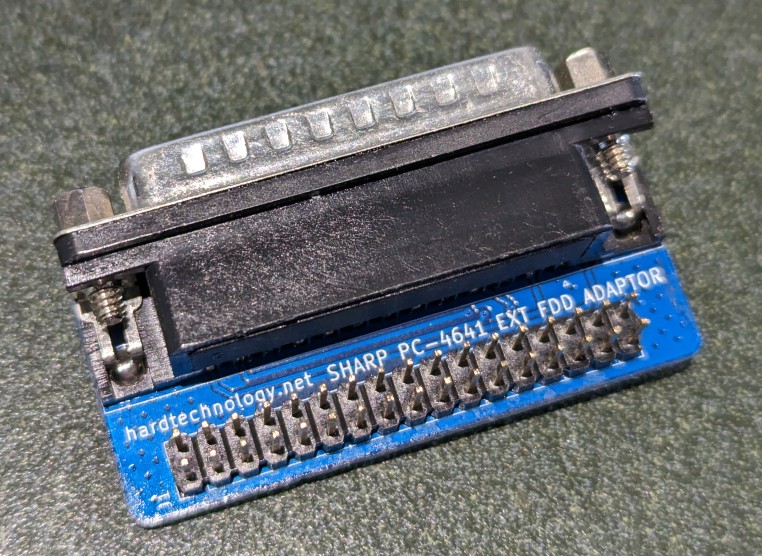
Assembly finished, time to perform some testing.
Assembling the External Drive Enclosure
The Power Supply
Power Supply for 5.25" Floppy drive needs to provide both 5v and 12v to allow the drive to operate. To simplify this a module to convert 12v to 5v was installed internally in the external enclosure, and a 12V 2A switchmode Power supply was used to power the unit. This should provide ample power based on typical 360K Drive Power Requirement specifications I could find. I suspect a 1A Supply would be plenty, but when seeking and spinning, the power is likely to spike quite high, so a lower current power supply has the potential to cause intermittent issues.
Floppy Drive
As mentioned earlyer, the Drive must be a 360K drive to be natively supported, and allow booting. Other drives could potentially be used with DOS drivers, however this has not been tested.
Enclosure
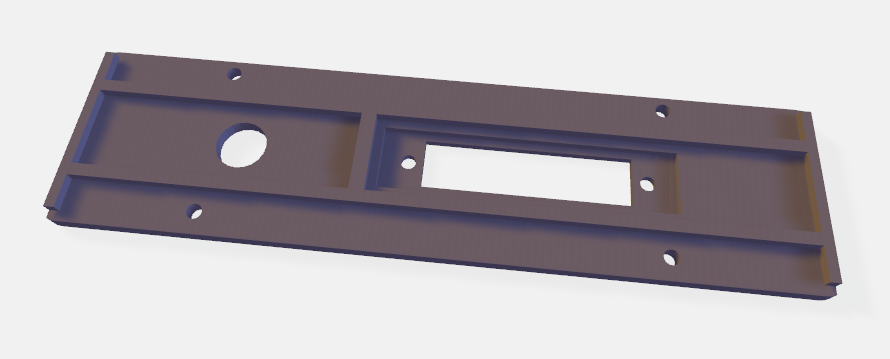
The external enclosure was purchased 2nd hand, missing the rear plate, so a 3D Printed model was created. This has a mounting point for the DB25 connector and a DC barrel jack for thr 12v input. I selected to keep these near the middle, so it would sort of hide the cables coming out the back if desired.
Assemble the enclosure with a short 34-pin to Edge connector cable, no twist is required so long as a drive is set to DS1 jumper (the default for PC Floppy drives).
Render of the 3D Printed Backplane for the enclosure
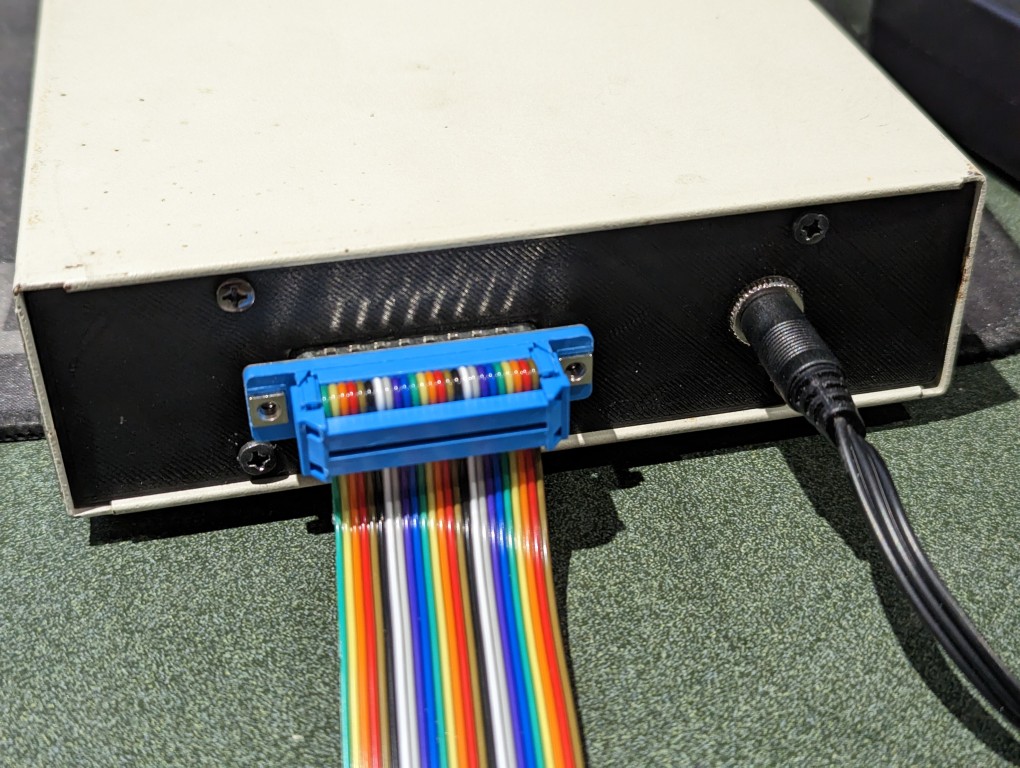
Rear of the External enclosure with cables connected
Connecting
To connect the enclosure to the computer we need a straight through DB25-Female to DB25-Male cable. I chose to use a rainbow ribbon cable (something found fairly commonly in this era) I had laying around and some IDC DB25 connectors from Altronics. When making your own cable be sure to keep even pressure on the IDC DB25 connectors to prevent breaking off the clips.
Ribbon Cable for connecting

Parts List
The following are available from Altronics
Altronics P4152A - DB25 Male IDC Plug
Altronics P4153A - DB25 Female IDC Socket
Altronics W2634 - 34-pin IDC Ribbon Cable
Configuration
By default the external floppy drives show up as DS2/DS3, so to access these you need to use DRIVER.SYS to allow access. The below command will allow access to the external drive. Once rebooted with the below command you should have an E: Drive (or similar - the drive letter is output when DRIVER.SYS loads) and access to the floppy drive should be successful.
Edit CONFIG.SYS
DEVICE=C:\DOS\DRIVER.SYS /D:2 /F:0
To Boot off the external Floppy Drive
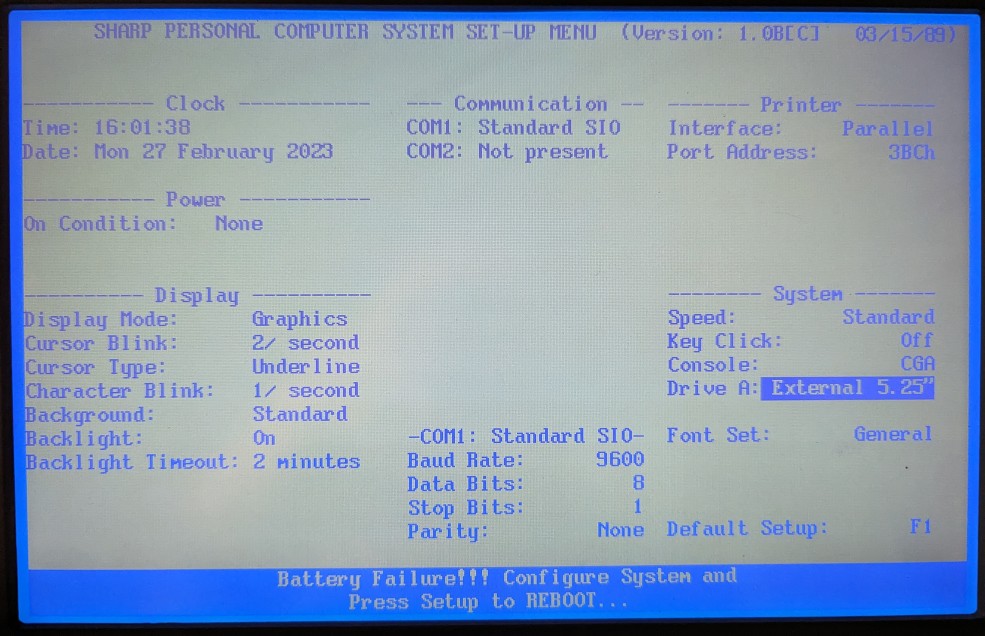
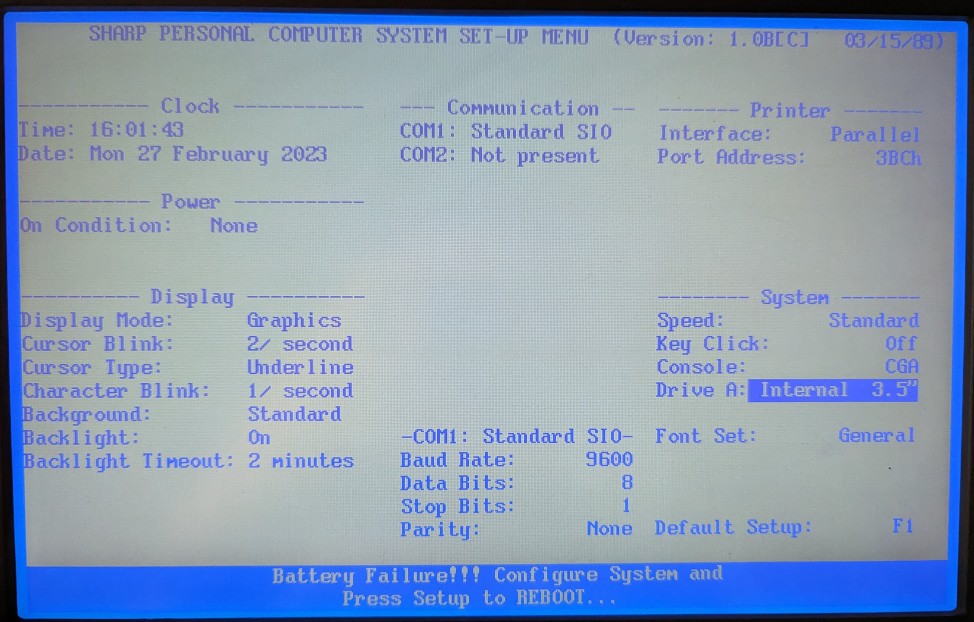
There is an option in BIOS that typically shows DRIVE A: Internal 3.5", whne trying to change this, it gets skipped when moving through the setup options. The below allows access to change this to External 5.25"
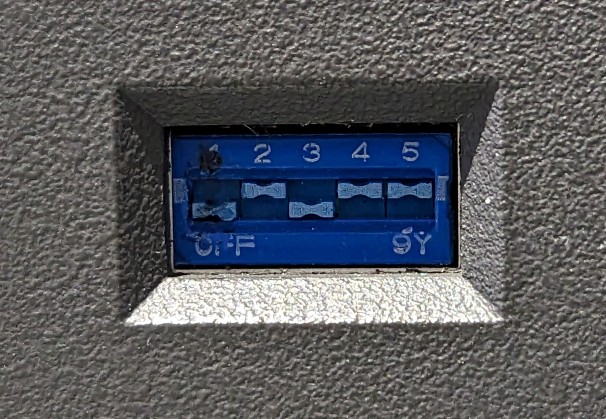
- Change the DIP Switch on the bottom to have SW2 ON to enable the booting from the External FDD (at least on BIOS 1.0B[C] (This seems undocumented as the service manual shows this as unused)
- Reset and Power on the Machine, and change the BIOS setting to External 5.25"
- Insert bootable 5.25" disk
- Continue to boot
System Dip Switches located on the bottom
BIOS with the External 5.25" 360K Drive set as a boot device
BIOS with the default Internal drive set as a boot device
CAUTION: This seems to cause problems with HDD Booting (could be XT IDE compatibility issue) that requires a complete power down and configuration reset to restore.
Summary
Although adding a 360K Floppy may seem counter inuitive when the system already has a 720K 3.5" floppy built in, the 360K format is more popular than the 720K, and this also allows a Gotek to be connected externally to the system, keeping the system looking original.
There is also potential to use other drivers to support a 1.44MB or 1.2MB drive where ther BIOS doesn’t support these formats, allowing further compatibily and expansion of the system.
A note on the FDD Controller chip, it appears to have the correct pins to support 8" Floppy Drives as well. This could be a future project. Although these are only availabe on the pinds of the chip and not broken out anywhere.
The system operational with the external drive

Further Investigation
- Look at using DOS drivers to allow larger (1.44MB/1.2MB) drives to be used with the system. An external gotek enclosure could then be added to provide further functionality and the use of USB sticks to transfer data.
Files
The below files were used in making this project, you can use them freely for personal, non commercial use.
5.25" Enclosure backplane STL File
